Wednesday, August 4, 2010

A Little Love to Share - Hearty Supper Salad

As seen on SheSpeaks.com/Special Edition July 30, 2010

The unbearable heat blanketing much of country has reminded me of my summers growing up in Wisconsin. My mother, ironically, never cared for cooking so we rotated through a consistent menu that I could probably recite even today.

When the sticky Midwestern summers were bogging us down, my mom always made a variety of cold salads gleaned from sixties cookbooks or peeled from food labels to avoid heating up the kitchen. For the next several nights, we'd serve ourselves a salad smorgasbord for dinner. A typical salad sampler would include classics like macaroni salad, potato salad, and tuna salad and we'd occasionally have beet salad or sour kraut salad. But the salad we all loved best was "Hearty Supper Salad."

These days, as soon as the temperature rises I start craving the stuff -- no kidding. Remember the blog I wrote a few months ago about food memories letting me down? Well this one, emphatically, does not. I love this stuff. My husband loves this stuff and, soon enough, I think you'll love this stuff too.

My mother got the recipe while watching a local television morning show in the mid-sixties. I have decided to make it my mission to revive our beloved "Hearty Supper Salad."

This is the original recipe and, frankly, I wouldn't change a thing. So do me a favor? Don't substitute any of the low fat alternatives when you make it the first time. Savor the delicious innocence of a quintessential middle-American-childhood-church social-picnic-salad. You don't get that much sour cream and cheese in a serving anyway, so live a little.


Hearty Supper Salad

Ingredients
1 cup elbow macaroni
2 cups diced ham
1 1/2 cups diced cheddar cheese
1 cup chopped celery
1 small onion, diced
1/2 cup sweet pickle relish

Dressing
1/2 cup sour cream
2 tbsp yellow mustard

Cook elbow macaroni as directed stirring occasionally, until the pasta has cooked through, but is still firm to the bite. Rinse with cold water and drain well in a colander set in the sink.

Combine macaroni, ham, cheddar cheese, celery, onion and sweet pickle relish in a large bowl. In a small bowl, stir together the sour cream and yellow mustard. Pour the dressing over the salad ingredients, toss until ingredient are completely coated with dressing. Cover and chill for at least one hour prior to serving.

Do you have any salad recipes that have passed down through your family? Please share your recipes!

Saturday, July 10, 2010

Don't Be Intimidated By Wine Tasting!

Modified article also available on SheSpeaks.com Special Edition


You know what drives me nuts? Wine snobs. Don’t let them intimidate you! I once took a wine class from Karen MacNeil, author of the Wine Bible, and she said that the best thing about wine is that learning about it is “purely hedonistic.” Isn’t that charming?

As Americans, I think we sometimes feel like other countries have a sophisticated advantage over us when it comes to wine. We may not drink wine around the family table as children but there’s no reason to feel intimidated and here’s why, as Karen MacNeil implied, drinking wine is fun, so learning about wine should be fun too.

You are probably thinking; “I don’t even know how to discuss what I taste.” You don’t need to be able to describe wine you are drinking in terms of its nuances, complexity or bouquet (nose) right away. I once did a wine tasting with a woman who described a wine as a “picnic in the park.” This wine reminded her of good times with friends; something she might drink on a sunny day or at a barbeque. That was perfect! She probably remembers the pleasant experience of that wine to this day.

Even Karen MacNeil doesn’t simply rely on traditional descriptors. I’ve heard her refer to Sauvignon Blanc as “stiletto heels” while Chardonnay is more “voluptuous like Marilyn Monroe.” Great visuals, don’t you think? You might not have tried Sauvignon Blanc before but from this description you can guess it’s a bit sassy, more challenging that a typical California Chardonnay.

I hope to give you a little information and a lot of courage. Don’t listen to those people who insist that they “only drink big, full bodied reds.” It doesn’t mean they know any more about wine than you. There is a world full of good wines out there – big red to light white to dessert wine. I like what New York wine merchant, William Sokolin, said about good wine, “What is the definition of a good wine? It should start and end with a smile.”


Smiles in place? Let’s start by learning the basics of wine tasting. Learning to taste wine is really just about stepping back and thinking for a moment before half of your glass is gone. Be thoughtful; take time to smell the roses or, in this case, the rosés. For simplicity, I will break down the tasting process into three steps – Sight, Smell and Sip.

Sight: Take a look at the wine in your glass. When you are participating a formal tasting, it is typical to look at wine over a white cloth or mat so that the background doesn’t influence the way the wine looks. Even if you don’t have a white mat handy, take a good look at the wine. How would you describe it? What color is it? Does it sparkle or look cloudy? Does it appear thick/opaque? As you learn a little more about wine, you’ll begin to notice common characteristics that may give hints to its age, style, and varietal.

Now, give it a smell. Don’t swirl yet. Just put your nose into the glass and sniff. Note what smells come to mind. Now, place the glass on a flat surface and give it a vigorous swirl. Smell again. Do you pick up anything different? Maybe it just smells like wine to you? That’s fine. As you practice you’ll start to identify different fragrances. Maybe you’ll find that a wine reminds you of a flower like rose or honeysuckle. Maybe it will remind you of fruit like cherries or apples. You might come across a wine that smells like fresh cut grass, a banana, or even Paas egg dye. Again as you practice this, you’ll begin to notice more. Each time a smell jumps out at you, try to remember it. This is how you’ll build your scent memory – the beginning of the ability to describe wine like the pros.

Okay, okay…it’s time to sip. Does the wine taste the way it smells or is it completely different? Did the wine remind you of anything like a picnic on a sunny day or a chocolate covered-cherry? Sip again and try to let a little air in your mouth before you swallow. Does the air change the flavors? How does the wine feel in your mouth? Does it seem heavy or light? After you swallow, breathe out through your nose. Does the taste of the wine linger?

Now think back on the whole experience: how the wine looked, smelled, and tasted. You’ve just taken your first step toward “professional” wine tasting. The tasting process can be more involved but you’ve got the basics. Now you just need to practice. Sight, Smell, Sip -- that’s really it. Follow the advice of wine expert, Alexis Lichine, "When it comes to wine, I tell people to throw away the vintage charts and invest in a corkscrew. The best way to learn about wine is the drinking."

Do you ever feel overwhelmed or intimidated about wine? Do you have any tips to help other readers?

Tuesday, June 29, 2010

Guacamole! Ole!

As posted on SheSpeaks.com Special Edition June 30, 2010


On a recent trip to San Antonio, my husband and I were walking along the Riverwalk when we passed a Boudro's Texas Bistro. A waiter with a cart full of ingredients was chopping an avocado into a bowl of fruit juice. Table-side guacamole. I was sold.

This isn’t your typical avocado paste. It’s a chunky colorful blend of avocados, tomatoes, and chiles. The twist is a combination of orange and lime juice – slightly sweet, aromatic, and tangy. It’s like summer in a bowl!

I’ve recreated the recipe for you. It’s my new favorite and I hope it will be yours too.


Guacamole Naranja
Guacamole with Orange Juice -This guacamole has
a juicy, coarse texture that is closer to salsa than a paste.


¼ cup freshly squeezed orange juice
2 tbsp freshly squeezed lime juice
½ tsp salt
1 large or 2 medium avocados
2 roma tomatoes, roasted, peeled, seeded and diced*
½ to 1 serrano chile, roasted, seeded and minced*
¼ cup diced red onion
¼ cup chopped fresh cilantro

Tortilla chips for dipping

Combine orange juice, lime juice and salt in a medium bowl. Stir until salt is fully dissolved. Halve the avocado(s). Remove the pit and scoop the flesh into the salted juice. Use two butter knives to ruggedly chop the avocado. This guacamole is rustic so don’t worry about precise cuts.

Next, stir in the diced tomatoes and chile. Add a little chile at a time so that you get just the right amount of heat. Then add the red onion and cilantro and stir to blend.

Serve with tortilla chips and a frosty margarita!

*Roasting Tomatoes and Chiles - Line a cast iron or heavy sauté pan with aluminum foil. Heat the pan over medium high heat. Add the tomatoes and chiles to the pan. Use tongs to turn often until they are charred on all sides and starting to soften, 8 to 10 minutes. Remove from the pan and cool. When the tomatoes are cool enough to handle, peel away most of the charred skin using a sharp pairing knife. Then, slice the tomatoes in half lengthwise, scoop away the seeds and dice. When the chiles are cool, slice in half lengthwise and use the tip of your pairing knife to scrape out the seeds and ribs. Mince.

Tuesday, June 8, 2010

Play with Your Food

With kids out of school for summer, I’ve been thinking about kid-friendly food. The classic conundrum seems to be the struggle between what kids want to eat, and the nutritious food we want them to eat. So I asked myself, "why, can't nutritious food be kid-friendly too?"

Kids want to eat food that’s fun and that tastes yummy. Who can blame them, really? Don’t we all want fun, yummy food, at least some of the time? Take dipping, for example. Isn’t it more fun to dip and dunk what we eat? Can you think of food that you dip that doesn’t taste better? Come on! Chips and dip, so much yummier than chips alone! How about chocolate fondue with strawberries? Juicy strawberries dipped in decadent chocolate…That’s food I’d play with.

Another delightful dipper is chicken tenders. You've probably been tempting to sneak a couple off your child's plate from time to time but then the guilt of fried food takes over and you stop yourself.

Well, I’ve come up with some chicken tenders that are so good you won’t want to share them with your kids! These dunkable delights are coated with herby yogurt and cornflake crumbs, so you get the tang of ranch dressing with a satisfying crunch. The trick is more flavor, less fat. Try dipping them in my Gingered Honey Mustard dipping sauce.


Chicken Tenders with Gingered Honey Mustard

1 c plain yogurt
1 Tbsp chopped fresh parsley
1 Tbsp minced fresh chives
2 pounds boneless skinless chicken breast tenders
2 c corn flake crumbs
1 tsp salt
½ tsp black pepper
Gingered Honey Mustard, recipe below

Preheat oven to 425°

Combine yogurt, parsley and chives in medium mixing bowl. Add in the chicken strips and mix to thoroughly coat. Combine cornflake crumbs, salt, and pepper in a shallow dish. One at a time, drop chicken strips into crumbs to bread lightly.

Place onto a lightly oiled cookie sheet. Bake for 12–15 minutes.

Serves 4 to 6


Gingered Honey Mustard

1/4 c yellow mustard
1/4 c honey
1/4 tsp ground ginger
pinch of cayenne pepper, optional

Combine all ingredients in a small bowl. Mix thoroughly.

Do you have any tricks for kid-friendly food that's fun and nutritious? Share your favorites with us

Wednesday, June 2, 2010

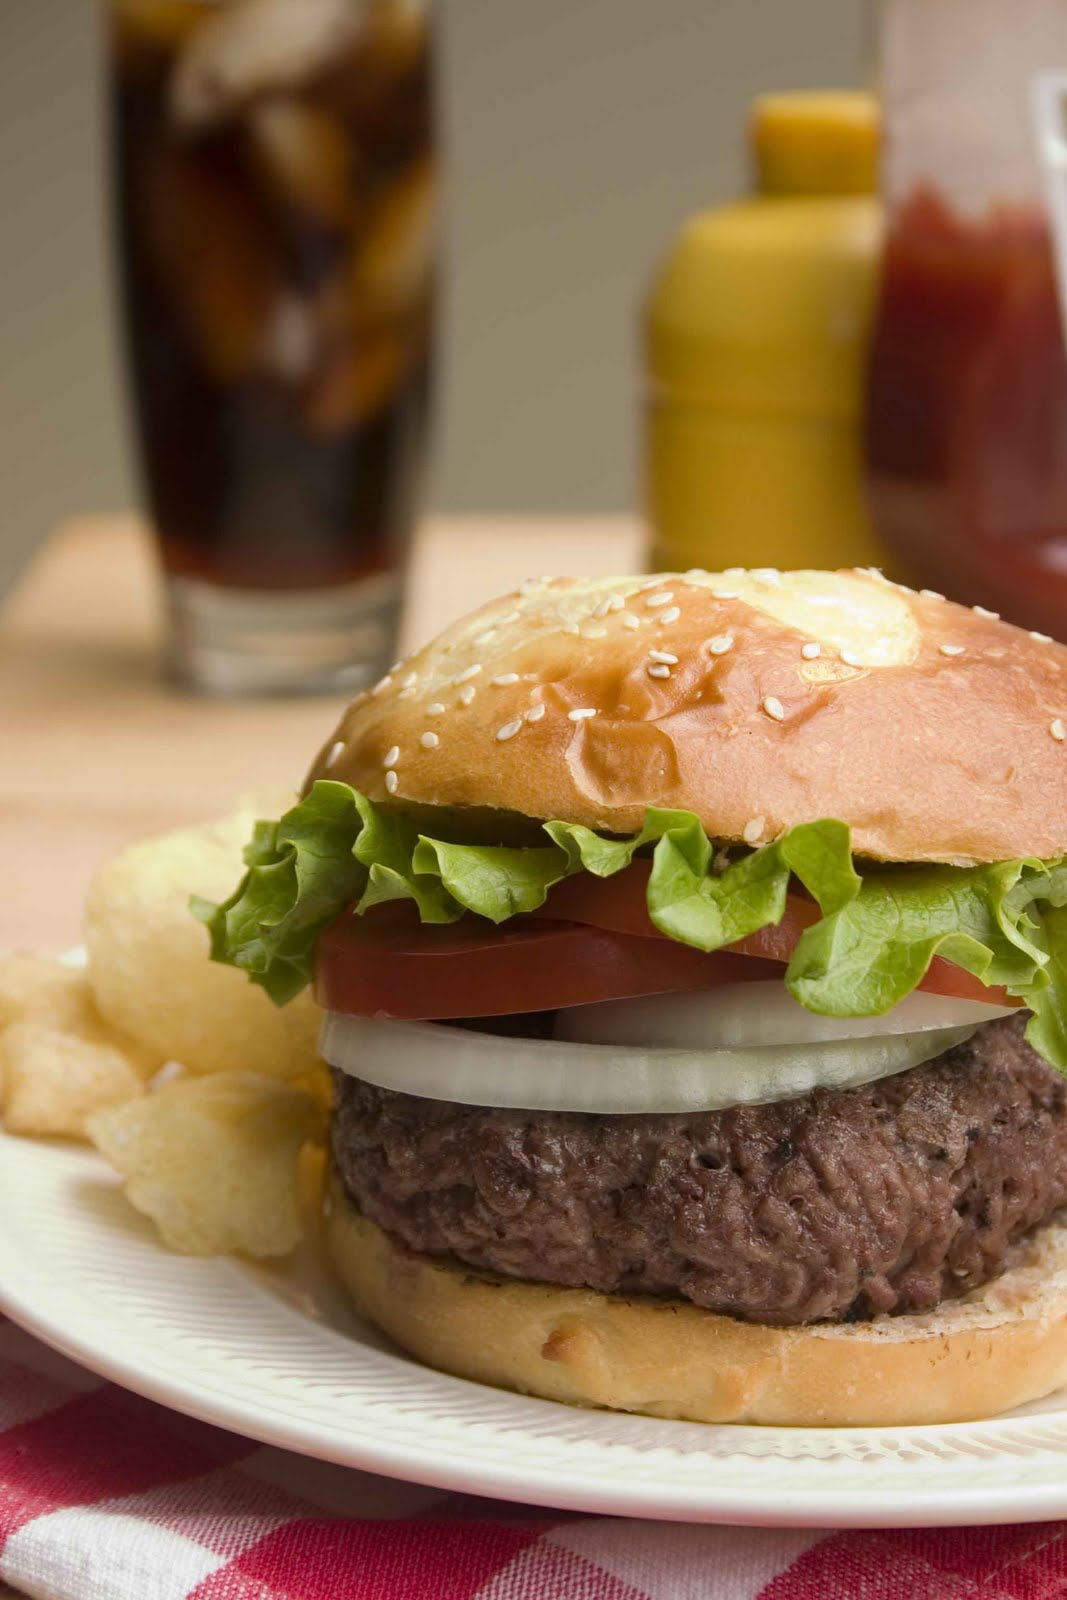
Best Burger Ever!

It's BBQ season again! Time to dust of the grill and get down to some serious summer feasting.

Burgers are classic American BBQ fare. I'm sure that there have been many heated discussions about what constitutes the best burger. The best beef to use. The best cut to grind. The ratio of fat to lean. Charcoal or gas. "Must use" condiments. Ultimately, I think most will agree that the burger has got to be juicy and flavorful.

I'm here to tell you that regardless of all the rest of the choices this one little tip is going change the way you eat burgers forever. Juicy, flavorful, burger nirvana! So, what's the secret to the Best Burger Ever? Get out some extra napkins because this tiny pat of heaven is gonna rock your burger world.


The Best Burger Ever!

Ingredients
2 pounds ground beef (or turkey)
Burger Nirvana Butter, recipe below
Salt and pepper
4 hamburger buns, your favorite
Burger condiments, your choice

Fire up the grill or preheat your grill pan.

Divide the ground beef into four equal portions. Slice four pats of Burger Nirvana Butter, about 1/8 to 1/4 thick each. Make an indentation in the center of each burger portion, and place a pat of Burger Nirvana Butter into the indentation and shape meat into a patty. (Be sure that the butter isn't sticking out anywhere.) Season each patty with salt and pepper.

Grill burgers to the desired doneness - about 7 minutes per side for medium, or 10 minute per side for medium well. Remove from grill and allow to rest for 5 minutes. In the meantime, spread a little of the Burger Nirvana Butter on the inside of the hamburger buns and toast lightly on the grill or grill pan. Top with the burger and your favorite condiments, serve and wait for the "oohhs" and "aahhs!"

Makes 4 8-ounce burgers.


Burger Nirvana Butter

Ingredients
2 sticks butter
1 clove garlic, minced
1 Tbsp minced shallots
3 Tbsp chopped fresh parsley
1/2 tsp Dijon mustard

Chop the butter into chunks. Using a mixer with a whisk attachment, whip the butter at medium speed until it softens and lightens in color, about 5 minutes.

Add garlic, shallots, parsley, and mustard to the whipped butter and beat for another 1 to 2 minutes until blended. Scrape the butter from the mixing bowl onto wax paper or plastic wrap. Use the edge of a baking sheet to form the butter into a tight log. Chill for 2 hours before serving or freeze for up to a month.

Thursday, May 27, 2010

Fresh Herb Focus - Chives


I thought it would be nice to take a closer look at some fresh herbs this spring and summer. I am going to be focusing on a new herb every week or so. Since I have beautiful purple chive blossoms in the back yard, I thought it would be nice to start with them.

Chives are some of the most under utilized herbs, don't you think? I bet many of you don't consider chives beyond snipping them onto a baked potato, but they are quite versatile. Their flavor is a cross between onion and garlic, without being as assertive as either of their cousins.

Chives are exceptionally easy to grow and they are perennial so they'll keep coming back year after year. You can even grow them on your windowsill. For those of you who've only seen chives in plastic cases at the grocery store, chive blossoms look like delicate lavender pompoms. To keep your chives growing happily, you should divide the bunches every couple of years by digging them up, chopping them in two, and replanting them. (Early spring is best for this.) Harvesting is easy too. Simply snip off as many stems as you need with a sharp pair of scissors.

Even if you don't grow your own chives, there are plenty of reasons to purchase them. Here are some ideas to try:


  • Use the chive blossoms in salads. They are pretty and edible. Or, submerge the blossoms in a jar of vinegar. Store the vinegar in a dark place for two weeks until the flowers have turned white and the vinegar is pink. Use the infused vinegar for homemade vinaigrettes.

  • Tie small bundles of vegetable sticks (carrot, zucchini, yellow squash) together with a long chive and then steam them.

  • Make chive oil by pureeing a large bunch of chives (about 1 oz) in a blender with 1/4 cup of olive oil. Strain through a fine size and season to taste with salt. This bright green oil can be used to garnish appetizers and soups, or as part of a homemade vinaigrette. Store in the refrigerator up to 5 days.

  • Snip chives over buttery corn on the cob.

  • Toss a teaspoon or two of minced chives into beaten eggs. Use them to make an omelet with a cream cheese filling.

  • Make your own chip dip. Simply mix a tablespoon of minced chives and a teaspoon of grated onion into a cup of sour cream, season to taste with salt and maybe a squeeze of lemon juice for zing. You'll have a delicious dip that's not filled with artificial flavors.

  • Smash yukon gold potatoes with chives and butter for a flavorful alternative to your regular mashed potatoes.

  • No time to bake from scratch? Top refrigerated biscuits with minced chives and shredded cheddar cheese (or roll inside crescent rolls) and bake according to manufacturer's directions. Your family will think you went out of your way for them.

  • Can you think of any creative ways to use chives? What other herbs are you interested in learning more about?

    Tuesday, May 18, 2010

    Winning Combination with Whitehall Lane Sauvignon Blanc


    The week before last, I attended a week-long class at the Culinary Institute of America at Greystone in St. Helena, CA - Food and Wine Pairing for Chefs. On the final day of the class, we had a "quick fire-style" competition. We were each given a bottle of wine, a protein item, and two hours to create a recipe that married the two. 

    I received a bottle of Whitehall Lane Winery's '08 Sauvignon Blanc and sturgeon.  After tasting the wine and taking a walk through the schools herb garden, I created a recipe for bite-sized Sturgeon Tostadas with Melon Salsa.

    Long story short, I was awarded the best-pairing of the competition!  Quite an accomplishment considering that the Culinary Institute of America is the premier culinary school in the country. I couldn't have been more proud. 

    Whitehall Lane Winery is currently promoting the recipe at the winery and I wanted to share it with you too!  So, without further adieu, here is my award winning wine pairing recipe for

    Sturgeon Tostadas with Melon Salsa 


    Makes 24
    1/2 honeydew melon, peeled and finely diced
    1/2 c minced red onion
    1 c minced red bell pepper
    1/2 c chopped fresh cilantro
    3 Tbsp fresh lime juice
    1 Tbsp rice vinegar
    1 tsp kosher salt
    2 Tbsp finely minced lime zest, for garnish

    2 tsp lime-infused olive oil*
    2 sturgeon filets, each 6 to 8 oz., with skin removed**
    salt and pepper, to taste

    4 thin corn tortillas, each 6 inches in diameter
    canola or peanut oil for frying
    sea salt (optional)

    In a medium mixing bowl, stir together the honeydew, red onion, red bell pepper and cilantro. Stir in the lime juice, rice wine vinegar and salt. Refrigerate for at least 4 hours before serving for best flavor.

    To make the tostadas, stack the tortillas in 2 equal piles. Cut each pile into 6 pie-shaped wedges, or small circles. Note: If you decide to cut small circles, you may need additional tortillas to make 24.

    Add oil to a deep fryer or heavy fry pan to a depth of at least 1 inch and heat to 375°F. Add the tortilla pieces a few at a time and fry, tossing them, until golden brown. Be careful not to let them darken or they will taste bitter. Lift out and drain on paper towels. Sprinkle with sea salt while still hot.

    Preheat an oven to 450°F. Season the sturgeon filets with salt and pepper to taste. Heat lime olive oil in an oven-proof sauté pan over medium-high heat.

    Add the filets and sear until the fish is pale gold, about 2 to 3 minutes. Turn the filets over and transfer the sauté pan to the oven and bake the filets until the flesh is opaque on the outside but still slightly translucent in the center, about 2 to 3 minutes. Cover loosely with aluminum foil to keep warm.

    When you are ready to serve, slice the filets cross-wise into thin wedges. Top each tostada with a wedge of sturgeon, top with a small spoonful of melon salsa and sprinkle with lime zest. Pour your guests a glass of Whitehall Lane Sauvignon Blanc and enjoy!

    *Note: Lime-infused olive oil is available in specialty stores. However, you can also make your own by adding lime zest directly to olive oil and heating the oil in a sauce pan on medium-low heat for 10 minutes.

    **Note: If sturgeon is not available, swordfish or another firm white fish can be substituted.

    Check out In Good Taste Wine Pairings for
    additional wine-pairing recipes!